How to make sparkling water at home: 4 methods compared (and which one is actually worth it)
Compartir
If you’ve made it this far, it’s because you’re tired of hauling packs of sparkling water from the supermarket, accumulating plastic bottles in the kitchen, or simply running out of bubbles on a Sunday afternoon. The good news is that making sparkling water at home is perfectly possible. The not-so-good news: not all the methods circulating on the internet work equally well, and some you really shouldn't try at all.
Here, we compare the four most common ways to carbonate water at home, with their pros, their cons, and their actual cost of use. By the end, you’ll know exactly which one is right for you.
What “carbonating” water really means
Before comparing, it’s helpful to understand what is happening inside the bottle. Sparkling water is water in which carbon dioxide (CO₂) has been dissolved under pressure. It is this dissolved CO₂ that forms the bubbles when you open the bottle and the pressure drops.
From this, we can deduce two rules that explain almost everything that follows: you need CO₂ and you need pressure. Any method that doesn't provide both will yield a poor result, with bubbles that last only a fleeting moment.
Method 1: sparkling water maker
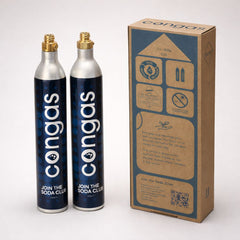
This is the most widespread domestic system and the one that best replicates bottled sparkling water. You screw in or clip on a reusable bottle filled with cold water, press a button, and the machine injects CO₂ from a pressurized cylinder. In a few seconds, you have sparkling water.
Pros:
• You control the level of carbonation: from a gentle fizz to an intense sparkle like mineral sparkling water.
• No single-use plastic waste: you use the same bottle over and over, and the CO₂ cylinder is returned for refilling.
• It is immediate and clean, with no mixtures or added flavors.
• The cost per liter is much lower than buying bottled sparkling water, because you only pay for the CO₂ refill and tap water.
Cons:
• Requires an initial investment in the appliance.
• You have to keep track of cylinder refills so you don't run out halfway through.
It is the logical choice if you drink sparkling water regularly, and not just occasionally.
Method 2: soda siphon
The classic method: a metal or glass container to which a disposable CO₂ cartridge is attached. You shake it, release the gas, and serve it under pressure.
Pros:
• Compact and with a great retro look for serving at the table.
• Can also be used to carbonate other drinks if the manufacturer allows it.
Cons:
• The cartridges are single-use, so each refill creates metal waste, and the cost per liter is much higher compared to a refillable cylinder.
• Capacity is usually one liter or less, which is impractical for a family.
• The level of gas is less adjustable: either the whole cartridge goes in, or it doesn't.
A good one-off solution for cocktails, but weak as a daily consumption system.
Method 3: baking soda and acid (lemon or citric)
This is the most common DIY trick: mixing baking soda with lemon juice or citric acid in water. The reaction releases CO₂ and the water bubbles immediately.
It works… but you should know what you are really drinking:
• It’s not sparkling water; it’s a homemade soda. The baking soda and acid don't disappear; they remain in the glass as salts, and that changes the taste. The result tends to be slightly salty or soapy.
• It adds sodium. Baking soda is, as its name suggests, a sodium salt. The World Health Organization recommends not exceeding 2,000 mg of sodium per day, the equivalent of less than 5 g of salt, and in Spain, people already consume an average of about 9.7 g of salt per day according to data collected by AESAN. Adding an extra source of sodium daily is not the best idea, especially if you have medical instructions to monitor your salt intake.
• The bubbles disappear right away. Since there is no pressure to keep the CO₂ dissolved, the gas escapes in minutes.
As a kitchen experiment, it’s entertaining. As a way to drink sparkling water every day, it is not recommended.
Method 4: dry ice (don't do it)
It appears in viral videos, and it is important to debunk it clearly: dry ice should not be used to carbonate drinks at home.
Dry ice is solid CO₂, and safety data sheets are strict: it should not be ingested or added to drinks, it causes cold burns to skin and eyes when handled without protection, it can displace oxygen in poorly ventilated enclosed spaces, and it should never be kept in airtight containers because it builds pressure as it sublimates, potentially causing the container to burst.
In other words: there are safe ways to get bubbles, and this is not one of them.
Summary table
|
Method |
Gas quality |
Waste |
Cost per liter |
Daily use |
|
Sparkling water maker |
High and adjustable |
Minimal (refillable cylinder) |
Low |
Yes |
|
Siphon with cartridges |
Medium |
Single-use cartridges |
High |
Occasional |
|
Baking soda and acid |
Low, loses effect quickly |
Low |
Low |
Not recommended |
|
Dry ice |
— |
— |
— |
No, for safety reasons |
So, which one should I choose?
If you drink sparkling water occasionally, a siphon can get you out of a pinch. If you drink it several times a week—or if there are several of you at home—a sparkling water maker is the only option that combines good carbonation, contained cost per liter, and the absence of single-use plastic bottles.
And there is one detail that is usually the clincher: with a machine on the countertop, sparkling water is no longer something that "runs out." You don't have to plan your shopping or carry heavy weight. It is there, with the bubbles you decide, every time you open the tap.
Ready to make the move? Discover CONGAS sparkling water makers and start making your own sparkling water at home, with the level of fizz you like best and without a single extra plastic bottle.